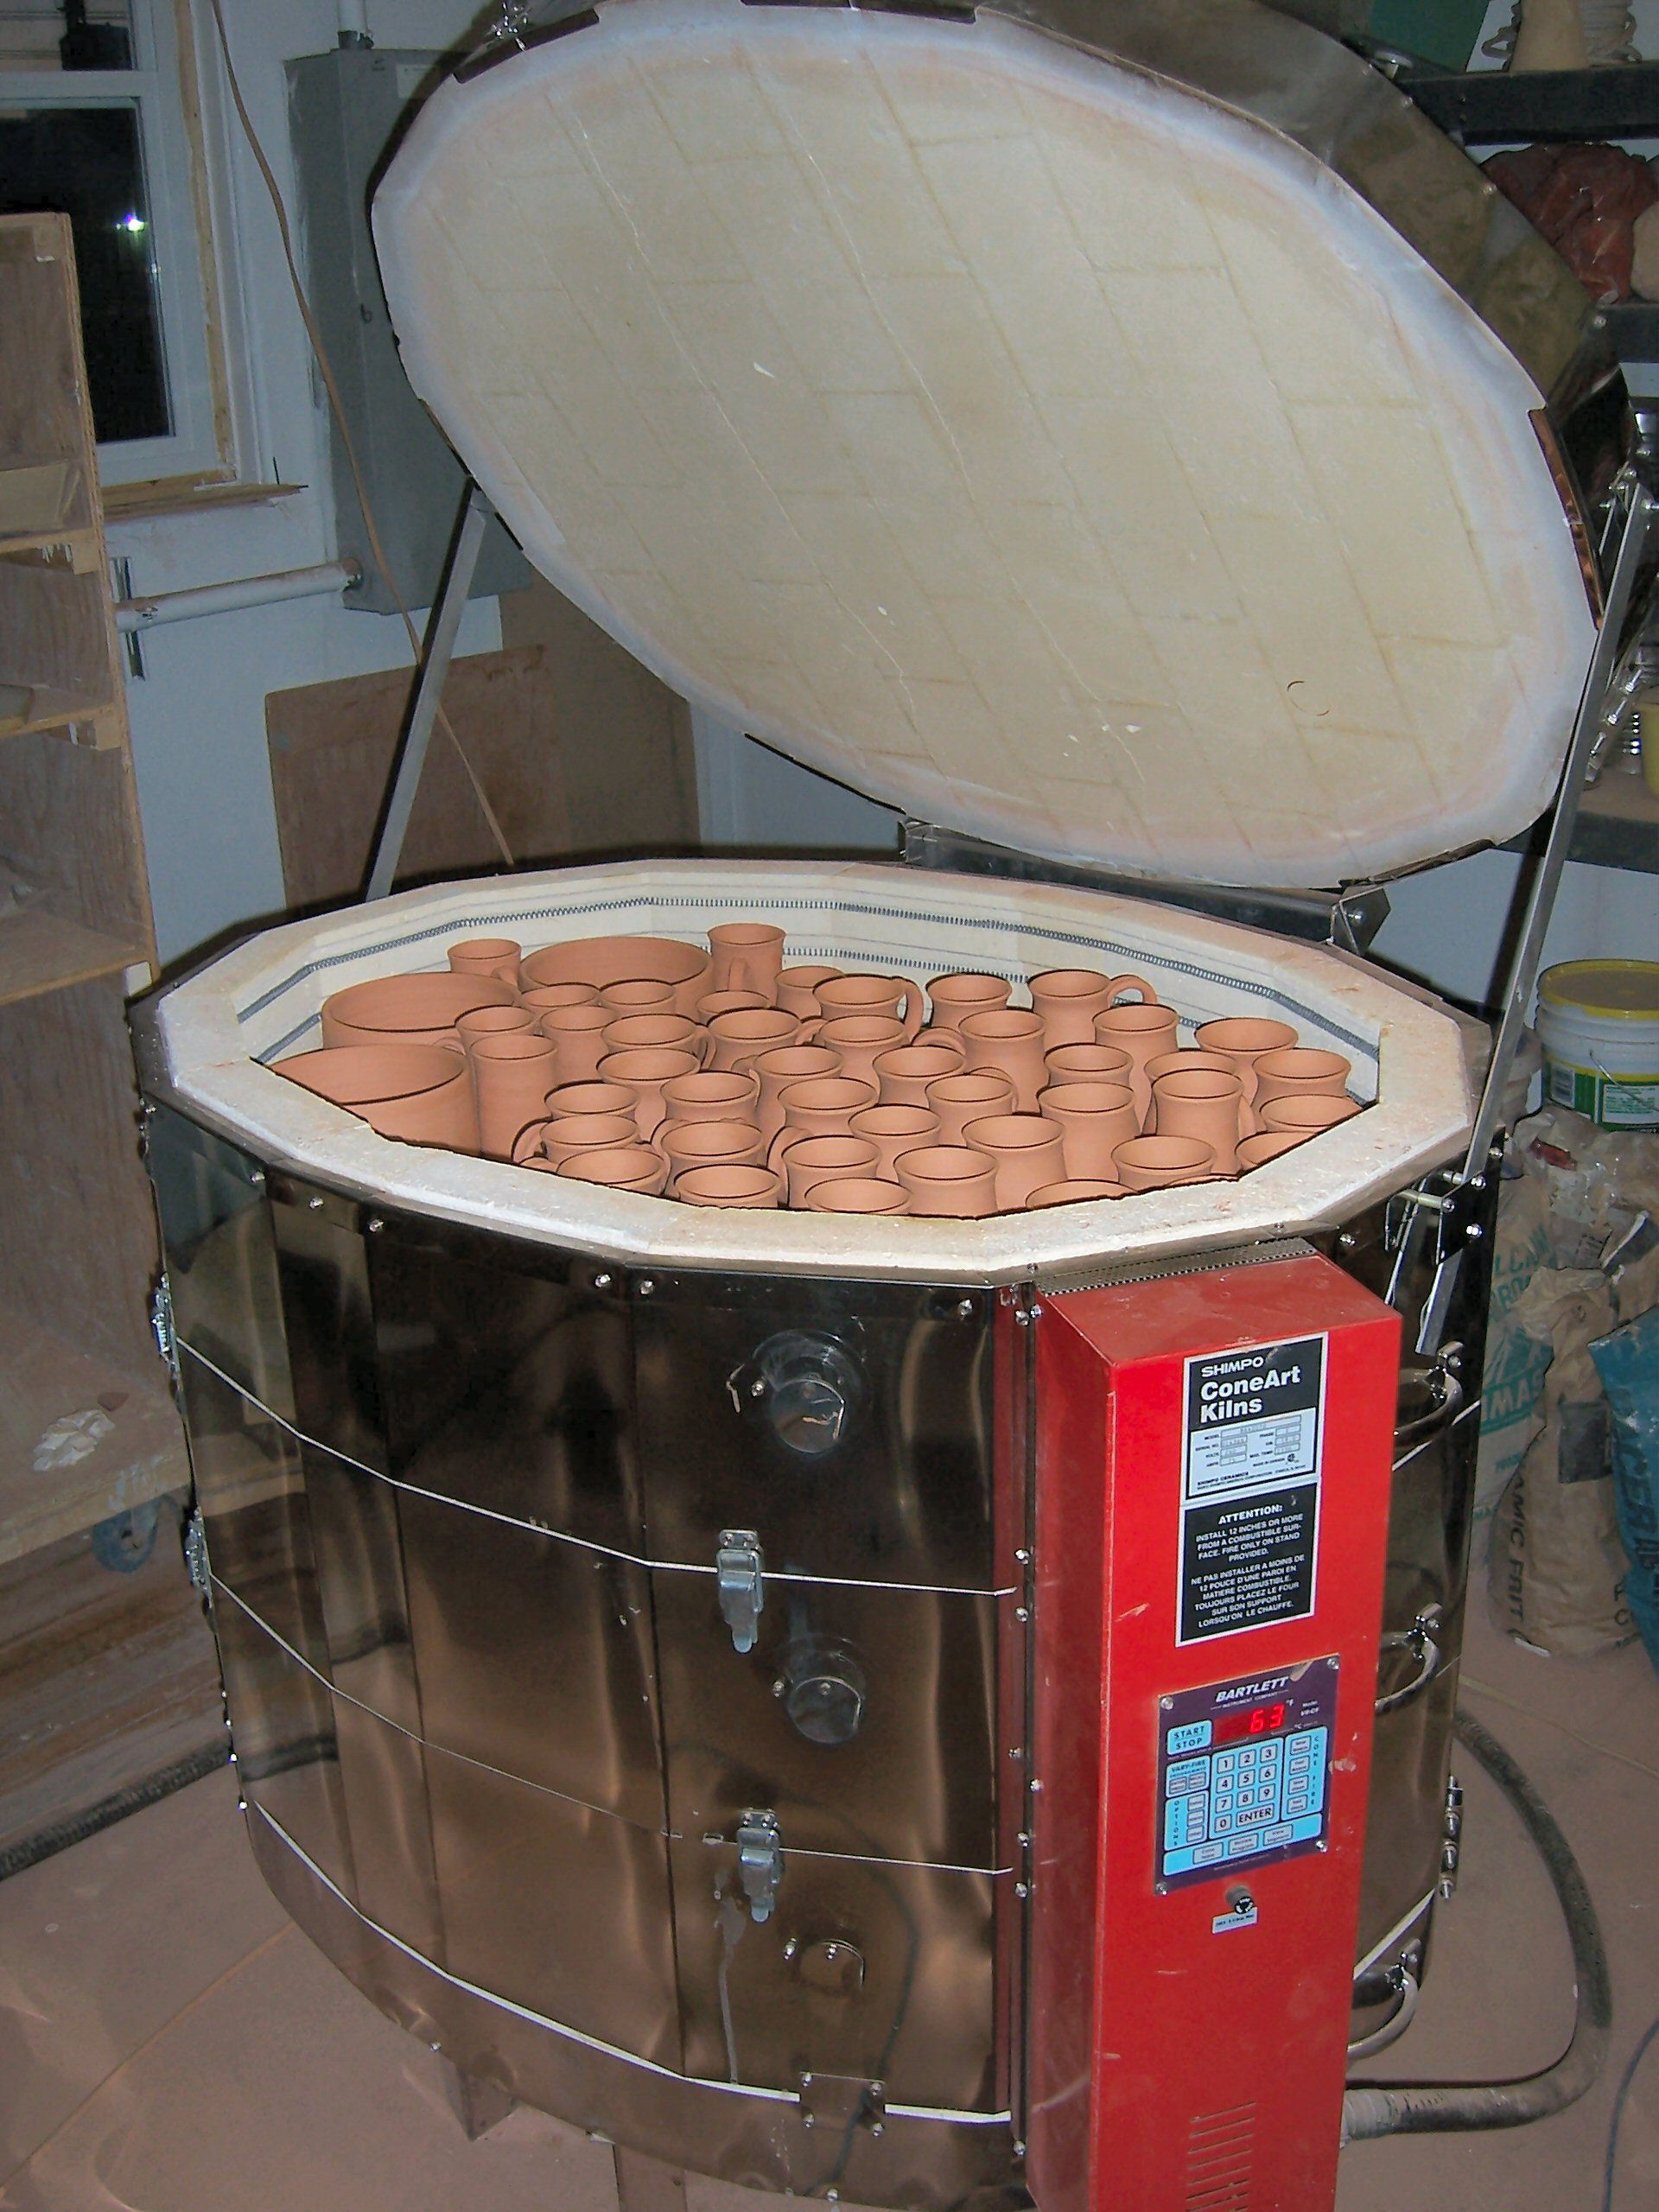
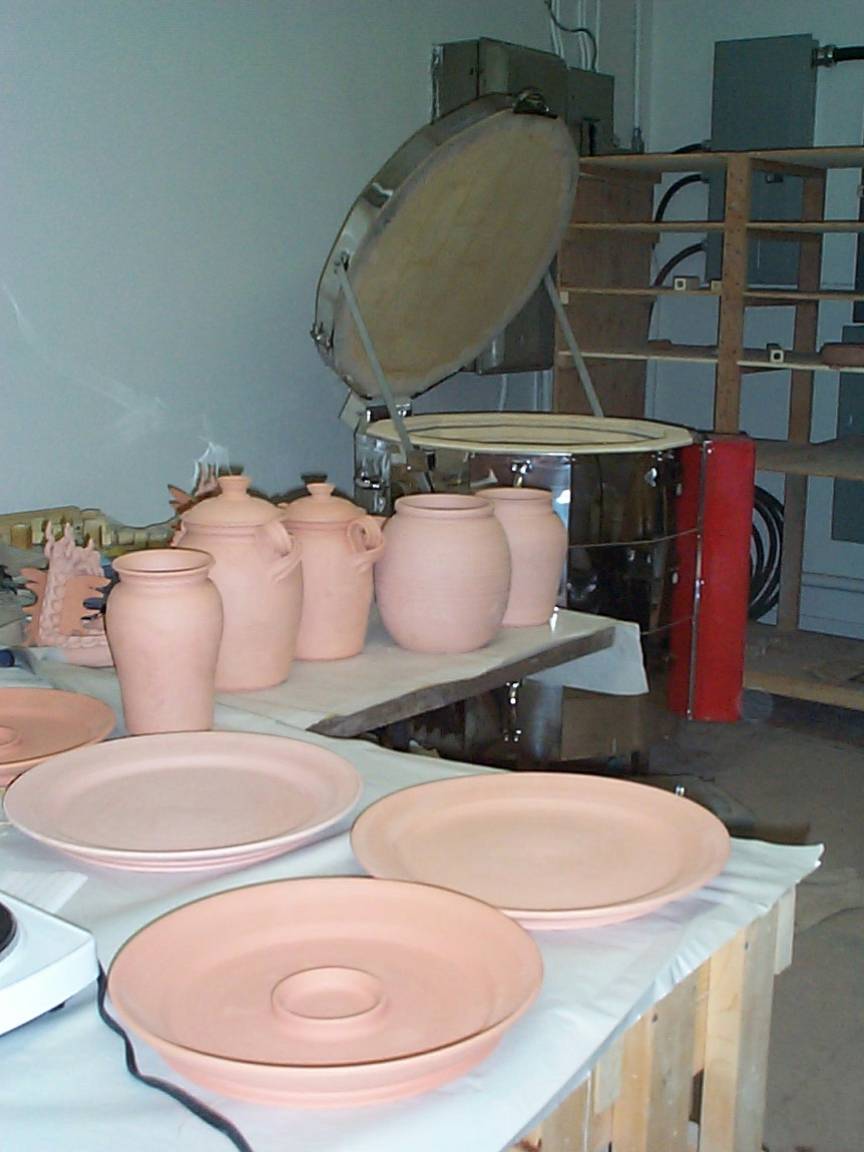
After the pot is completely dry it is ready to be bisque fired.
This initial firing removes the physical and chemical water so that the piece can be glazed without returning to mud and breaking.
The temperature we bisque at is approximately 1700 degrees Fahrenheit.
Many potters prefer to bisque at a higher temperature as more impurities are forced from the clay,
however for the glazes we use this temperature works well. Bisque pottery made from our red Alberta clays
takes on a terra cotta appearance, similar to the flower pots you see in a florist's shop.
(Click for a larger image) |
(Click for a larger image) |
The next stage in the creation of the pot is the application of glaze.
Every potter has his or her own formulation for glazes and many of these are a
closely guarded secret as the unique properties imparted by a particular glaze
fired on a particular clay body, combined with the characteristics of the design of the piece
are what identifies the pot as belonging to a certain potter.
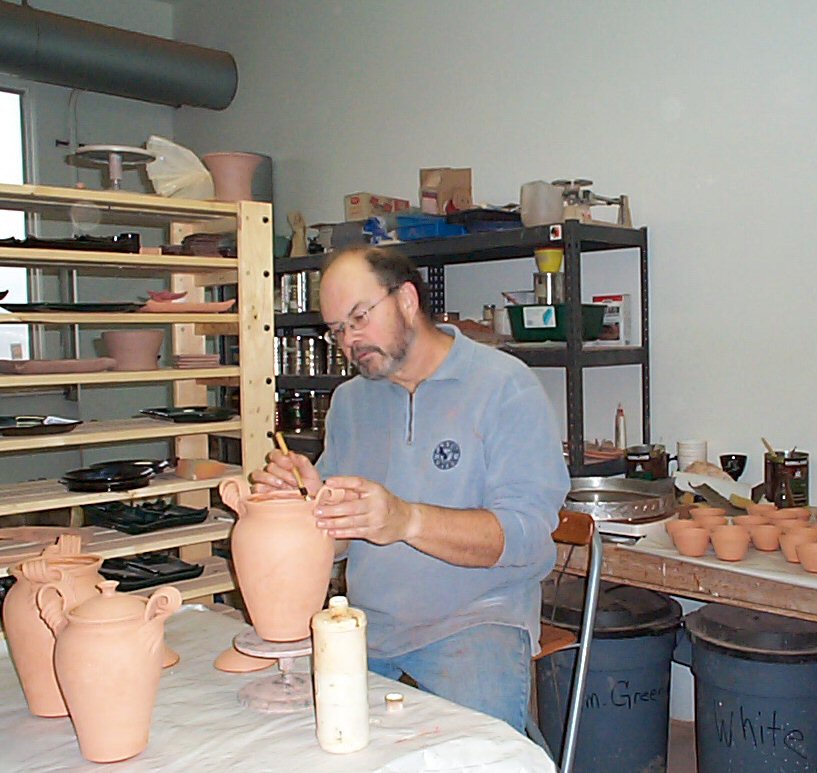
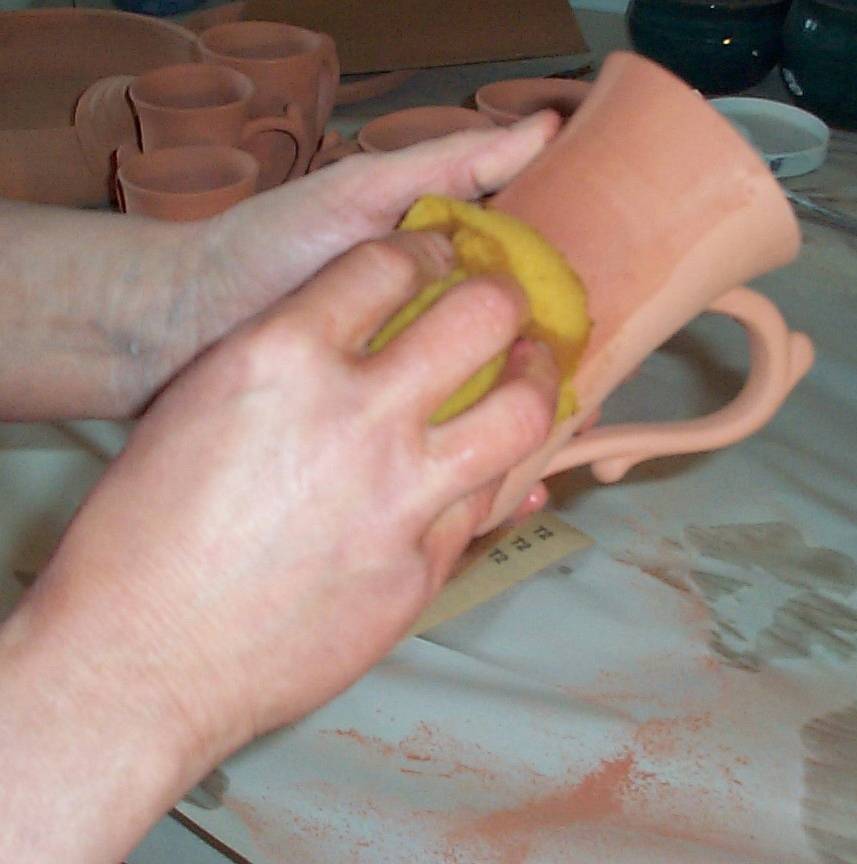
However, before we apply the glaze we must prepare the piece.
First we check the pot and remove any bumps or imperfections we see. We may use a 100 grit sandpaper
or a kitchen paring knife edge to smooth surfaces. We then sponge the entire surface
of the pot to remove any dust left from sanding to provide a clean surface for the glaze to adhere to.
(Click for a larger image)
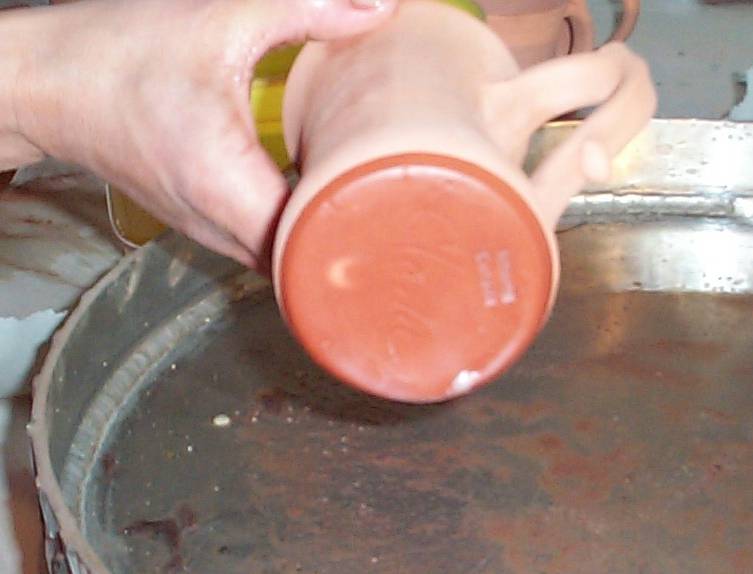
Next the bottom of the pot is placed in a pan of paraffin wax so no glaze will stick to this area.
If we glazed the bottom the pot would become a permanent part of the kiln shelf, and that's not a good thing!
Some potters prefer to use a water based wax which has the advantage of not requiring heat nor smelling strongly as paraffin does.
Other potters just wash the glaze off the bottom of the pot.
|
 |
(Click for a larger image)
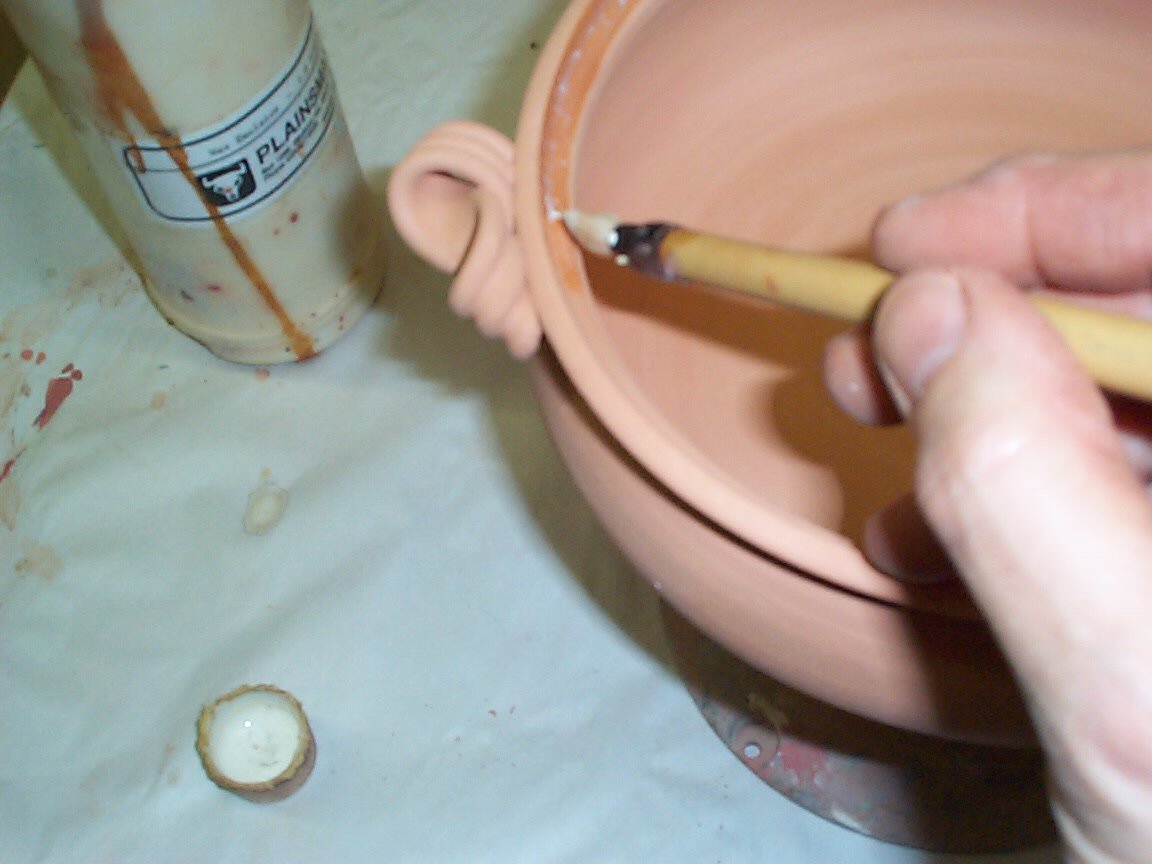
If the pot has a lid, such as a casserole or bean pot for example, we apply a wax emulsion
with a brush to the areas where the lid and pot meet. This keeps the glaze from the lid and pot
from melting together and forming a solid sculpture with the lid bonded firmly in place!
|
 |
(Click for a larger image)
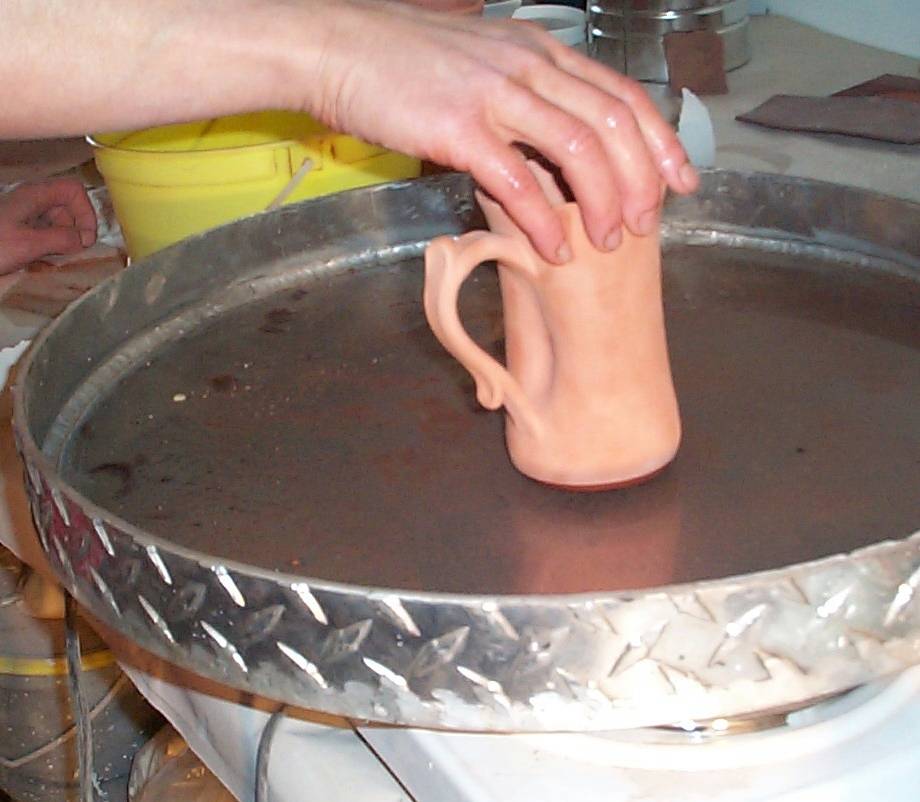
Glaze can be applied by several methods but we prefer to dip our pots into a container of glaze.
Next, using dipping tongs the pot is totally submerged in glaze, lifted out and set aside until it dries.
Notice how no glaze adheres to the waxed area.

(Click for a larger image)
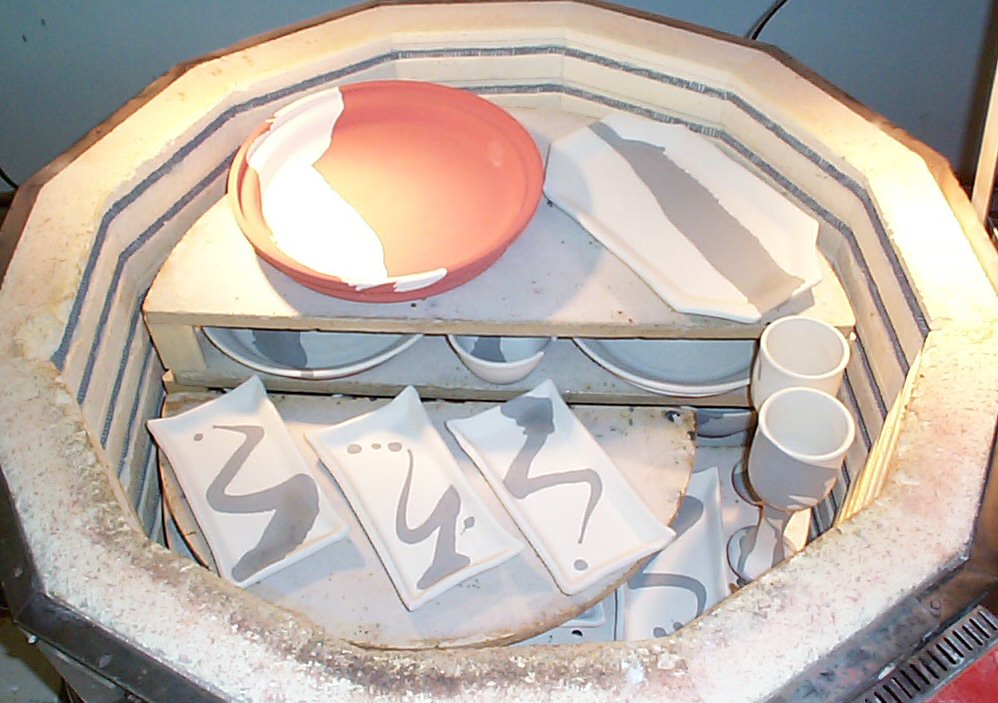
Once the pot is glazed, it is returned to the kiln for a second firing, in which the clay and the glaze are matured,
meaning stoneware is brought to a temperature at which it is no longer porous and the glaze achieves a glasslike finish.
In the case of our pots which are fired in an oxidation environment in computer controlled electric kilns this temperature is
over 2100 degrees Fahrenheit. This final temperature is decided by trial and error and is again influenced by the nature
of your clay body and the glazes you use. Kilns can be fired to cone or temperature.
We have our own firing schedule which allows us to fire to temperature over a specified time in controlled increments.
(Click for a larger image)
After achieving the desired temperature the pots are allowed to slowly cool over the next 24 hours
before the kiln is opened and we see the finished pot for the first time.
In some ways every time is like the first time as the "Kiln Gods" can sometimes really surprise you.
The finished pot is then given a final sanding and dusting before being packed for shipping.